Sunday, 17 November 2013

Reflective Report


Reflective Report

Can't believe that this chapter is finally done and closed. What started as an idea is now a fully rendered movie that we didn't think we could do when the third year of this course started. Satisfaction to get it done is immense. Everyone worked extremely hard to get this final movie to what it is today.  I knew it will be a huge challenge but we always thought that is the only way to bring out the best of each individual in this group.

Pre-production started quite messy as all of us were inexperience and didn't know what to do to begin with, although we were taught to start with just pitching ideas and later to lay down all concepts and designs but to produce a professional level of pre-production work was totally beyond our abilities. However, we managed to put in what we can and what has been taught. As time progresses, lots of ideas were changed we but we managed to keep the important elements in the base story. We struggled to get the pre-production done but overall we got it done. Should we given a second time to do a new project, I believe everyone will achieve a far better result at a more professional level.

I have learned so much at this level, in which is also the most important stage of this project. This is where planning is most critical, as this will later help in the production stage. It will definitely saves a lot of time as a good well planned pre-production will eliminates a lot of problems that we encountered at the later stage. Overall, I must admit that at this student level, we achieved experience that can only be gained through hard and dedicated work. We now certainly have the confidence to work at a pace that is more smooth and scheduled.

Production was most interesting as we are now at a stage where we will start putting all the work we have done into getting everything on paper to 3d. This is a stage where we all have to put our best work to making the final movie. Modelling is my strongest skill and I have no problem to have everything modelled as planned, although there were a few changes but we all have them done as planned. The only problem we encountered were to decide what to model in higher resolution and what in low-poly. As mentioned that we were inexperience, we can never see what we should do in the modelling stages till we see the final render.

Again, after many hours of tedious and hard work, all the effort we put in, the final movie is very satisfying for us. We have achieved an ambitious work that we are happy with. We all able to sit back and watch the final movie with great satisfaction and I am proud with this team that has been hard working and most important, has learned a lot in this production and are ready to combat in the real 3d industry world.

As for the whole process of this production stages, there are many trials and errors but only with these that we can only learned more and able to do it better in the future work. Everyone has achieved something they didn't think of in the early stages. We all able to share what we learned and able to work as a team. We finally composited all the rendered clips in After Effects where we add most of the correction in the clips and later brought it to Adobe Premier to add in the background music and audio effects. I certainly learned a lot in this stage and I certainly believe that there are more room for improvements.

Wei and Sean has been most helpful in helping to get this project done. Their guidance has been part of this successful final movie and this team would like to thank them to achieve what we had today. Thumbs up for JMC to get me at where I am today, most grateful and appreciated.


Sunday, 20 October 2013

Animations Blocking

 
Opening Scene

 
https://vimeo.com/77324783
 
Model the desert scene with just simple planes and cubes. Wasn't happy with the first terrain I model as I find the texture is simply not hi-res enough. The hardest part is the ncloth simulation as Maya ncloth itself is unpredictable. Lots of trials and errors before I got what I wanted. I find that ncloth presets doesn't work in most cases. Further tweaking is required and sometimes the most unimagined preset does the job with some tweaking. Here I use the 'chain mail' preset where I have to increase the wind attribute to very high in order to have the cape moves with the wind. Further effects are done in After Effect where I used a green screen sand storm downloaded from internet. Will add more animations to this scene like tumbleweed rolling and particles sands blowing in different directions to make this scene as realistic.


Cliff Top


Same basic modelling of the cliff top and the animation is just a basic walk to the edge and stop before the camera close in to the character to reveal the city. I ran into problem using the saved ncloth preset above as the cape doesn't flow the way I wanted. After blending the chain mail with the silk preset, the cape lifted a little. I further reduce the Maya nucleus gravity attribute to achieve the cape nicely blown against the wind.


Temple Front


This is probably the hardest animation I did as the timing is crucial in this scene. Also I knew that the cape simulation going to be hard after tedious hours I spent on the previous animations. This scene's animation is more dramatic and the chances ncloth going to break is high. I did plan ahead before doing this animation and I was using plenty of ncloth's constraint to mimic as much movement for the cape as the character has two leaps in this scene. Here, I increase the gravity in the nucleus attributes to extremely high, just to hold down the cape as much as I can. This is also the most breakdown in term of camera shots to get the feel of the character leaping.
 
 
Tunnel Scene


Animation is minimal in this scene but the lightings will play an important role in giving the mood in the tunnel. I model the tunnel using basic cyclinder shapes with cubes for the pillars and rocks. I further shaped the tunnel using the sculpt tool. Finally found a sword reference I like and model the sword. Ncloth is most easy and I used the chain mail preset with no physical attributes.
 
Posted the snow animation details in the last post but was unable to upload videos here. Finally got Vimeo working and the links below each image are the those animations blocking done for the last two weeks.
 Also included is the snow animation with the link below.
 
https://vimeo.com/77324897


Sunday, 6 October 2013

Snow Mountains

 
Snow Scene


Simple cube and sculpted using Maya Sculpt tool. UV mapped it in less than a minute with a plugin called UV Master in ZBrush and painted the texture using projection painting in Mudbox. The only problem was to get a high resolution (4096x4096) image for the mountain and snow texture. Did further sculpting in Mudbox to extract a normal map to give slight details and bumps to the terrain. This scene will be composite in After Effects with additional layers of fog created in Photoshop. Thus detailed of the rocks is not necessary. We will be using a matte painting for the background and the entire scene will be lit with just a single directional light and a HDRI image in Maya.


Referenced the character and animated the climb. I placed a camera at this angle and distance (above image) and animate the camera moving away and panning to the back of the character to give a sense of the huge mountain and surrounding.


Camera position at frame 110.


End of frame 204.


This is the next shot of the camera where the character appears at the top of the climb and finally it will fade into the shot below where the character is walking on the top of the mountain (image below). I referenced the character into a new scene and animated him in a walk cycle I did earlier for the 'Bamboo Forest'. Changed the setting to post-infinity in the graph editor and set the time line to have the character walked 3 cycles. Saved the file and re-referenced it in this scene and just animate the terrain moving backward. The walk is slightly different where the character struggles to walk in this snow with his head looking down to the ground.


Using this method of referencing saves time as we can reuse the animation in different scenes. We can use animation layers to further animate the character in those scenes. The only difficult  task is getting the timing right in each different scenes. 


Temple Front

The Big Orange


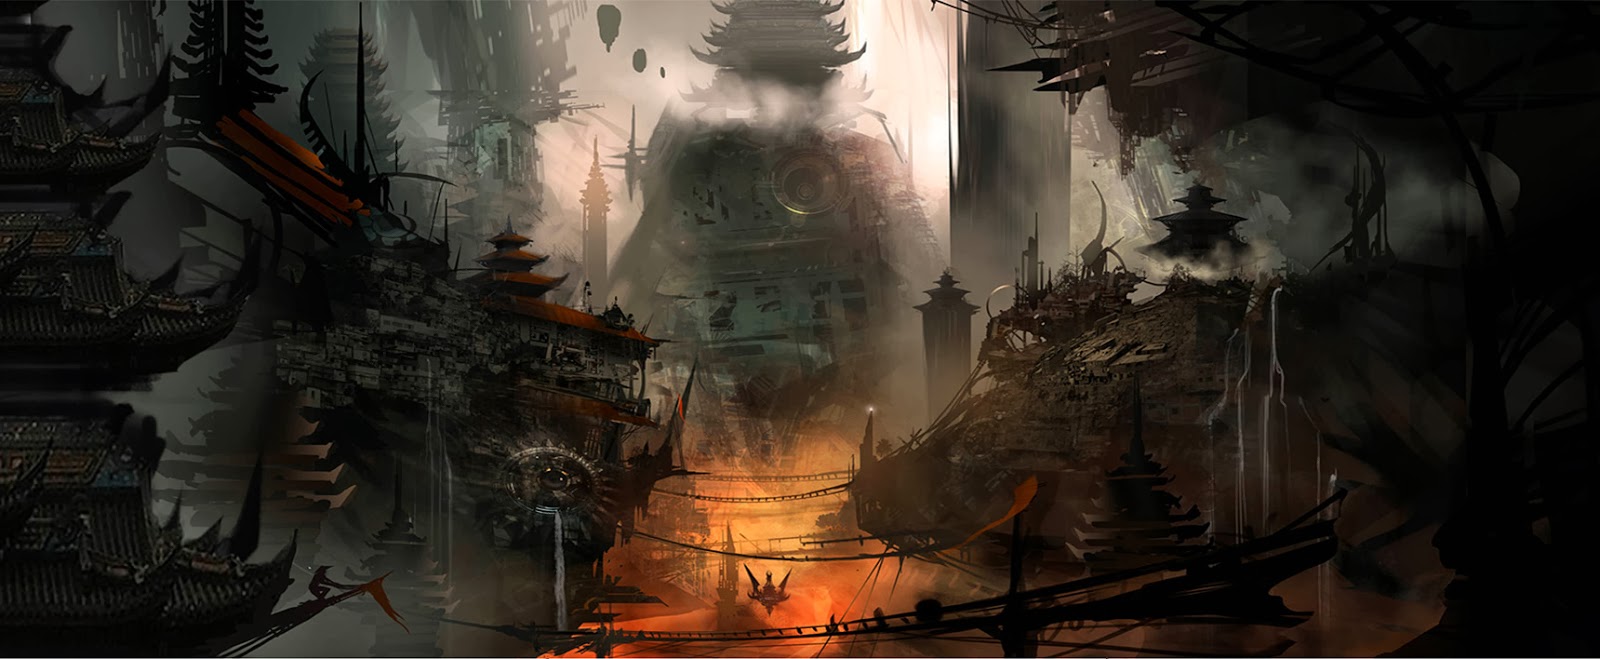
I call this colour palette mood The Big Orange. We had the idea of just placing a big fire in front of the temple initially but we thought that a big fire doesn't make any sense to get the feel of something big and bright in the centre of the set as Andrew first suggested in the colour palette during the pre-production planning. Anne-Marie suggested the idea of lava flowing and that leads us to the idea of building a structure that is built on top of the lava to illuminate the bright yellow and orange light.


This structure was modelled in low-poly in Maya, using only simple shapes of cube and sphere. The main shape is just a cylinder shape with 8 sides. The process is quick and easy. The entire modelling and UV mapping took just 2 hours. I added extra elements like woods and stones around the structure to give it a more messy but natural look. Textures are of the most basic image file downloaded online. I changed the colour and hue saturation in Photoshop in order to have all the materials of the structures to blend in nicely. 


I use Crazy Bump to extract a normal map to add details to this structure. Did a quick black and white map in Photoshop for the tiles pattern in the crossed bridge of the structure. At the base of the structure is the lava itself. Just a simple plane mapped with a lava picture. We will add a specular map to the shader where the yellow will be brightest and red is secondary. The dark will stay dark. This gives the illusion of lava giving out light when the scene is rendered.


I placed some point lights around the structure and we will be placing some fires in After Effects. Two main point lights will be place in the centre of the structure, one that has linear decay and cast shadows, while the other with a less intensity with no shadow. The idea is to brighten the whole area with yellow and red lights to give the effect of 'The Big Orange' in the scene. Depending on whether we are going to animate the character in this scene, we might animate the lave moving slightly to show the flow of the lava underneath.

Sunday, 29 September 2013

Terrain 01

The Terrain


Created the mesh using Maya ocean. Then converted it to polygons to get those natural shape. I sculpted it further to give more height  and flatten area where needed. Then I simply duplicate and resize them to give different mountains in the background. UV map is just a simple y-axis planar projection and have the texture painted in Mudbox. The problem is when rendered the quality is low. This is due to the fact that no image is big enough can be obtained to paint the whole terrain. The tiling effect is obvious when the scene is view from far. Repeated textures make the terrains look cg. I did a research online and found a good software (Vue) and able to export the terrain and paint the texture there. I then did a render of the terrain after the texture is painted from the top view and managed to save the image at a high resolution (4098x4098) and map it to the terrain in Maya. 


The above image doesn't has the texture tiling effect as the 4k texture map is good enough to cover the whole mountain. I further give more details to the mountains by extracting a normal map using Crazy Bump. The settings there are important to fine tune the outcome (like setting the finer and large details to the appropriate values).


Did a test render with just one directional light and using raytrace shadow. The bump is a bit high but can be reduced in Maya settings by lowering the value in the bump attribute. The background will of HDRI based image (sky and clouds) to lit up the scene a little more.


Bamboo Forest

Bamboo Forest


Modelling the bamboo forest was probably the easiest task. Simple cylinder and planes to shape up the bamboo and leaves. Texture them in Photoshop and duplicate them to fill the scene. All I did was changing them in size and shape to make them look as natural. The rocks were done using cubes, and sculpted them using the Maya's Sculpt Geometry Tool. The hard part was to uv map them as evenly to avoid texture stretching. I found ZBrush has a very good plugin called the UV Master. A very simple, fast and accurate uv map generator with least effort. A one minute process instead of 15 mins in Maya. I then painted the rock texture in Mudbox as this is object is organic. I mentioned in previous post that painting organic textures using 2D Painting program like Photoshop is not accurate.


The ground plane is just a simple texture of tiny rocks and grass. Just a simple y-planar projection. I also create a 'gobo' in Photoshop, a simple 'Scattered Maple Leaves' brush painted randomly on the uv map in solid black (different sizes and opacity ) and saved the file in png format. This format with transparency with let light through in the Maya scene but cast shadows on the ground.


I did a quick render and was quite happy with the outcome. Got all the details needed and it rendered in just 40 secs with just one single 'directional' light.


Finally I turned on the 'gobo' and did another render and got the 'fake shadows' I wanted. This method gives nice soft shadows and won't make the scene becomes dark. The background will be replaced with a matte painting and the compositing will be done in After Effects with extra layer of fog in-between to give depth to this scene. This scene is rendered using Mental Ray and Ray-Trace shadow. I encountered a minor problem as shadows from part of the plane (the leaves and gobo that has transparency) were casted on the ground and rocks. Did some research and able to fix it up in the Attribute Editor (material section/raytrace options) where I turn the setting in the 'shadow attenuation' way done to 0. This resulted in clean shadows casted on the other objects. This however increase the render time but the effect is worthwhile.


Sunday, 22 September 2013

The Pagola

The Pagola


Did a lot of research (online pictures) on Chinese architecture especially the roof. Took me a while to get the shape and placement right. The outcome is good. Modelled part of the pagola and duplicate it around the y axis 5 times. The base is from simple cube shapes.

 
Took quite some time to UV map this mesh as it has many different shapes. All this is done in Maya using planar projection.

 
Texture the entire pagola in Photoshop as this is a non-organic object in which I find it more practical to do it just applying texture in 2d.

 
Test render in Mental Ray and the outcome is not too bad. Might redo the texture with higher resolution texture to bring out more of this pagola. Will decide at a later stage when applying lightings whether to use a normal map to enhance the details as this scene will be quite dark.

The Cave


The Cave


Cave interior

 
Modelled using basic shapes except for the stone Buddha. Added some major props like the wooden house and bridge. Will be adding more minor props like extra woods and stuffs to make the cave more complicated and untidy.

 
Uv map and applied some textures was quite easy as I just use Maya's Auto mapping. This saves time as this model doesn't move or to be animated. I only UV mapped the wooden objects to give a more accurate texture mapping and character to them. We will be using Maya's ocean to simulate the water in the cave.


Placed some Point Lights with one Ambient Light on the background and did a test render in Mental Ray. Will be using Maya's Particles to simulate fire in the cave. We will be placing a lot more lights in the scene to bring out some of the objects' details and give depth to the scene. We might also use normal maps if required to bring out the details of the cave. Render time was quite cheap in this render and we hope it won't cost a lot more with the extra lights we will be putting in.
 
It's a bit tedious modelling those organic shapes in Maya. Should have just create the basic shape of the cave and sculpt it in Mudbox using the Grab tool. It would have save half the time modelling them in Maya. Texturing the cave is as easy as flooding the entire UV map with a single jpeg texture, and only use Mudbox's projection painting to do the stone Buddha's face to give precise and accurate details to the face. If I would have taken the modelling into Mudbox, I might have done the cave a lot bigger as Andrew first suggested. We all are happy with the outcome and hopefully after placing more appropriate lights in the scene, it will give the correct mood in the render outcome.

The Warrior

The Warrior


Done the modelling in Maya 2013. Quite happy with the outcome of the topology and details of the model. Modelled the entire model using a sketched reference picture I did in Photoshop. I would have use a realistic picture of a person should I were to model a similar character to get the proportion of the body precise especially the fingers and the face. This would help when doing the joints and rig at a later stage.


UV the character using a third party software, Headus UV. Using Maya to uv map this character is tedious and not as accurate. I find it hard to get the map without much stretching. I decided to redo the uv mapping using the later software. It is a lot faster and precise uv mapping. Minimal stretching of the texture.


Took the mesh into Mudbox and started sculpting details to extract a normal map. It's a new operation for me but finally got all the extra details I needed. However when I applied the extracted normal map to the character and did a test render, The character went bizarre. Wei suggested I take the normal map into Photoshop and repaint it. And after smoothing the normal, it came out brilliant. Instead of applying the texture in Photoshop, I used Mudbox's projection painting to apply the final texture. It is accurate and details can be painted on the mesh exactly where I wanted. I find painting the texture in 2d isn't as accurate. I find the other advantage painting in Mudbox is the accuracy of using tools like the dodge and burn tool to enhance the shadows and highlight area because of the real time normal map that indicates where the exact folds and bumps of the mesh. It will be hard to do that using Photoshop to paint in 2d.


The most satisfying stage after I completed this rig. It is a simple rig but it does everything we need to animate this character. As for the head, I use blendshapes I sculpted in Mudbox. It is fast and easy. I just need to sculpt the blendshapes required for this character. Rigging the head would take much longer time and I find the blendshapes work just as good. I took Wei's advice to skin the mesh using Maya's component editor after I painted part of it using the Paint Weight Skin Tool. This gives a better deformations of the character when animated. However I encountered minor problems as the topology and geometry of the mesh isn't as perfect. I overcome this problem especially when animating the elbows, shoulders and the knee using corrective blendshapes. Found a great script online called The DeltaExtract mel script, which saved me a lot of time.


Posed the character and did a test render using Mental Ray. There was some minor issues where part of the character poked through the mesh as the whole mesh of the character is made up from few different mesh. I managed to overcome the problem with the corrective blendshapes and I am happy with the outcome. The cape and part of the character's clothing will be ncloth simulation. Might consider using ncloth to do the hair but Wei suggested that leaving the head as it is will be good enough as ncloth will be expensive in render time.
 
In conclusion, if I were to do this character from scratch, I will use a realistic reference pictures to model it in precise proportion, it will definitely help when doing the rigging. Furthermore, extra geometries will be added for the mesh where needed to give a better silhouette of the character, which then will make the normal map producing a more realistic details. I will also use less geometries in the more complicated area like the eye's folds, as this will make the normal maps not as accurate. I can then later add the geometries back after applying the normal maps and the outcome will be more natural and better. The other trick in bringing out the details is to use high resolution texture but sometimes it is hard to obtain one online. It will be worthwhile to subscribe from website like CG Textures to get those high resolution texture. I went through the rigging process with minimal problems. Only problems are the rig is not as clean when completed. This is due to the lack of cleaning and grouping appropriate joints and controllers as I rig the character. If I were to do all that from the start, it would surely saves me time going through the entire rig to locate the problem. Overall, I am happy with the outcome. Can't wait to animate this character with all the other props and models in the complete scene set.

Sunday, 18 August 2013

Low Poly Models


Done the low poly modeling and texturing for the city and referenced all the required models. Could not believe that referencing the entire scene only takes up 353 kb in file size. And the scene is moving as smooth in the viewport. Met Andrew over the weekend and discussed about the layouts. Finally able to create a simple and easy to use camera rig and might add more realistic camera movement in a shot.

Also done modeling two characters and will start to rig them in the coming week. Can't wait to model the costumes and texture them. Hopefully I can finish modeling the interior of the cave and reference all the required low poly models before the end of next week. Others have been busy doing some of the high poly models and we hope all the modeling can be finalized in week 6.

Everyone has been right on schedule so far and hopefully we all can keep up with the workflow.